If there's one idea that made photography click for me, it's this: light isn't just bright or dim, it's soft or hard. Once you can see that quality, you start to understand why a portrait taken by a window looks gentle and lovely, while the same person under midday sun looks harsh and tired. It's the same person and the same camera. The only thing that changed is the kind of light falling on them.
Getting this distinction clear is worth more than almost any gear upgrade, because it teaches you to read a scene before you shoot and to move toward the light you want. Here's what soft and hard light really are, and how to use each one on purpose.
What soft and hard light look like#
The difference between soft and hard light comes down to the shadows. Soft light produces shadows with soft, gradual edges that fade slowly from bright to dark. Hard light produces shadows with crisp, sharp edges and an abrupt jump from light to dark. Look at the edge of any shadow and you can immediately tell which kind of light you're dealing with.
Soft light is gentle and forgiving. It wraps around a subject, fills in wrinkles and blemishes, and keeps the whole scene in a comfortable range of tones. That's why it flatters faces and why portrait photographers chase it. There's no harsh line under the nose, no squinting, no blown-out forehead.
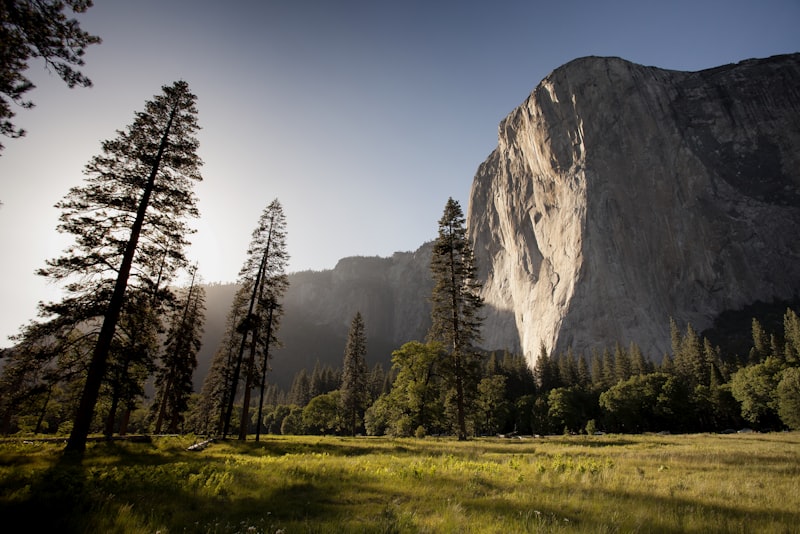
Hard light is bold and dramatic. It creates deep, defined shadows and strong contrast, which can be unflattering on a face but striking on the right subject. Think of stark shadows across a building, the glint on rippling water, or a moody scene split between bright and dark. Hard light has energy and edge; it just needs the right subject to carry it.
The one thing that controls it#
Here's the part that surprises most beginners: whether light is soft or hard has almost nothing to do with how bright it is. It's controlled by the apparent size of the light source relative to your subject. A large source gives soft light; a small source gives hard light. That's the whole rule.
The classic example is the sun. On a clear day, the sun is effectively a tiny point in a vast sky, so it acts as a small source and produces hard, sharp shadows. Put a layer of cloud in front of it, though, and the entire sky turns into one enormous glowing source. Suddenly the light is soft and even, and the harsh shadows vanish. The sun didn't change; its apparent size did.
Big source, soft light. Small source, hard light. Memorize that one sentence and you can predict how almost any light will behave before you lift the camera.
Distance plays into this too. The closer a source is to your subject, the larger it appears and the softer the light becomes. A window right beside someone is a big, soft source; the same window seen from across a large room is smaller and harder. This is why moving your subject a few feet can change the whole feeling of a photo.
Where to find and make soft light#
Soft light is usually what beginners want, especially for people, and the good news is it's easy to find once you know what makes it. You don't need equipment — you need a large source.
- An overcast sky is a giant softbox covering everything, which is why cloudy days are secretly great for portraits.
- Open shade on a sunny day gives soft light bounced from the open sky, without direct sun.
- A large window with indirect light is the classic indoor soft source, gentle and directional.
- Early morning and late evening light is lower, warmer, and softer than the harsh midday sun.
You can also soften hard light yourself. Hanging a thin white sheet or curtain between the sun and your subject spreads the light out, enlarging the apparent source and gentling the shadows. Bouncing light off a big white wall does the same thing, turning the wall into a soft source. These are the same tricks studio photographers use, just with household objects.
Because soft, low light at the ends of the day is both large and flattering, it's the easiest situation to start with. If you want to lean into it, how to photograph in golden hour light covers how to make the most of that warm, gentle window.
When hard light is the right call#
It would be a mistake to treat hard light as the enemy. It's not worse than soft light — it's a different tool for different jobs. Learning to use it, rather than only avoiding it, opens up a whole style of photography.
Hard light excels at anything graphic and bold. Architecture looks powerful when strong sun carves out its shapes and casts crisp shadows. Street photography often thrives on hard light, using dark shadows and bright pools of sun to build drama. Textured surfaces — cracked earth, rippled sand, weathered wood — come alive when hard, raking light rakes across them and exaggerates every ridge.
Even portraits can use hard light when you want mood and edge rather than softness. Dramatic, high-contrast lighting suits a moody, cinematic feel, as long as you place the shadows deliberately. The point is choice. When you understand that hard light means a small source and sharp shadows, you can decide to seek it out for the right subject instead of only running from it.
Of course, hard light also shows up whether you invite it or not, most notably at high noon. Handling that specific situation has its own set of tricks, which I go through in how to shoot in harsh midday sun.
A quick way to decide which light you want:
- Shooting a portrait and want it flattering? Reach for soft light.
- Shooting architecture, texture, or a bold graphic scene? Hard light adds punch.
- Want drama and edge in a portrait? Hard light, with shadows placed on purpose.
- Not sure? Soft light is the safer, more forgiving default.
Learn to see the shadows#
The habit that ties all of this together is simple: start looking at shadows instead of subjects. On your next walk, glance at the edges of the shadows around you. Are they crisp and sharp, or soft and gradual? That single observation tells you what kind of light you're standing in and what it'll do to anything you photograph.
Try a small experiment. Take a portrait of someone in direct sun, then the same person in open shade or by a window, and compare the shadows on their face. The difference between hard and soft will be obvious, and once you've seen it on your own photos you'll never un-see it. From there, choosing your light stops being guesswork. You'll walk into a scene, read the shadows, and know exactly what you're working with before you ever raise the camera.